
My equipment consists of a craft knife, a miter box and saw, three different gluing thingies for keeping pieces squared while the glue dries (none of which am I really thrilled with), clamps, masking tape (which I used a lot of) and a cutting mat. So, this isn't professional quality, artisan furniture building here. As an aside, if you want to see that, you need to visit Elga's blog (see my profile for a link). She's the lady from South Africa who I will be meeting in Amsterdam to visit that German miniature show. Her woodworking skills sort of boggle the mind and she's only been at it maybe a year or two, if I remember right.
 So, okay - mostly pictures now.
 When I made my first bookcase, I actually managed to come up with a good way to get pieces of wood cut to the same length which probably anyone else who has only the miter box and saw to work with has also come up with, but just in case - it's as simple as taping the two pieces of wood together and cutting them both to size at the same time. Doesn't work for things that need a miter cut, of course, but for straight cuts, it really is a help, at least for someone like me who finds it impossible to mark two pieces of wood separately, cut them in the miter box separately and have them come out exactly the same. So these two pictures are just starting out after having stained all the wood. On the left, the wood for the sides of the bookcase is taped and in the miter box and on the right, the first side piece has been glued onto the back and is clamped. I realize stained wood doesn't glue as well as raw, but the rock and the hard place one has to choose between is either a better hold for the glue, or avoiding spots that won't take stain because they've had glue on them. I opt for the second choice.

Don't ask me why every other picture shows the wood a different color. I'm not a professional photographer either! On the left I've added balsa wood to the bottoms of the cases so that the baseboard will have a better surface to glue to. And one of the bookcases already has its crown molding in place. To do that, I first glued pieces on the top as shown in the picture on the right, again giving myself a better surface to glue to.

 I wish they really were this color, I really like it. :) But I couldn't keep buying cans of stain until I found the perfect one! I debated gluing each piece of crown molding on separately, gluing all three pieces together first and then gluing the whole thing on, or doing it this way which was to glue one corner together, glue that piece on, and then glue on the other side piece. The reason for this was because had I glued all three together first and then tried to glue it on, I would have had glue all over the place I think. And if I had glued the three pieces on separately, I think it would have been more difficult to get everything thing as straight as I got it (which still isn't perfect!)
 In these pictures I'm starting the shelves. You can see two shelves cut out with the tape still around them on the left. Also in that picture are two side pieces that I cut taped together. When I made my first bookcase, I really had to ponder for a while how I could possibly hope to get level shelves and then this idea dawned on me. I cut out the little side pieces, glue them on each side, lay the shelf on top of them (in the picture on the right), glue on the next two side pieces, and so on. I don't even have to glue the shelves in! And, voila (I'm going to France!), level shelves.
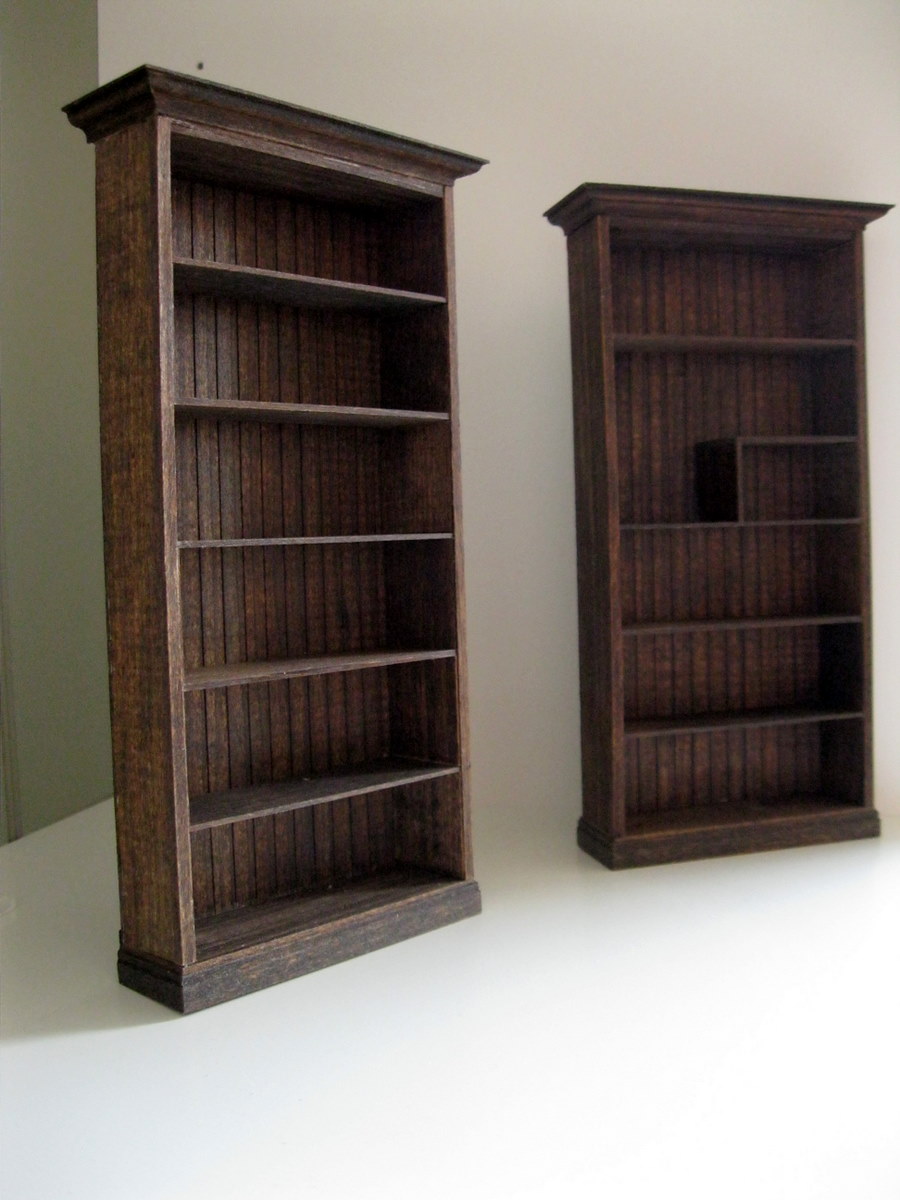
The bookcases have several hidden defects, and the stain and finish is not the quality I'd prefer, but when filled up with books and other goodies, I think they'll do quite well. And I got fancy on the one and made the half shelf so I could have something taller in the open space or maybe even hang a little picture or something.
So now onto the roombox. I cleared off my cardtable, dusted the sawdust off my windowsill and pulled out the roombox and put it on the table with all the electrical supplies so I'm ready to get started on it. I'll post shorter progress reports which I have progress to report. :)
5 comments:
Mary Lynne, come on, the bookshelves looks great!!! I make lots of mistakes too, it is a fine art disguising them so nobody sees or knows about them. I mean we do work really small and I have long ago accepted that on this earth we will never be perfect or make perfect things with no flaws.
They look picture-perfect to me and I imagine they look perfect up close too. I guess you need to keep a regular travel schedule in order to stay focused on your projects! xoxo
I sure think they look pretty darned spiffy in the end! Perhaps another product for your Etsy store!
I can easily imagine, like you, trying to cut solo pieces of wood (to be used in pairs) and coming up with minuscule differences in length--taping 2 together is such an obvious solution, and so simple, once you finally hit upon it! Congratulations!
Thanks for the kind comments. I AM happy with them like I said, but there's just no comparison to aritsan-made furniture. I think I should probably glue them in place and then no one could ever take them out and inspect them closely! :)
And, Chris, when I first started on these I thought to myself that "gee, maybe I could make a couple for my Etsy shop". But no way!!!
SO EXCITING! Caps lock exciting :)
They look great, Mama. xoxo
Post a Comment